Difference between revisions of "TESM"
| Line 82: | Line 82: | ||
=== TIRF === | === TIRF === | ||
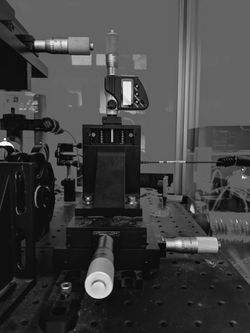
| − | [[File: | + | [[File:IMG_TIRF-Adj.jpg|thumb|250px|right|TIRF adjustment]]TIRF stands for Total Internal Reflection Fluorescence. The three micrometers in the picture adjusts the angle and focus of a converging beam. |
The top micrometer moves the beam towards or away from the front of the microscope. | The top micrometer moves the beam towards or away from the front of the microscope. | ||
| Line 92: | Line 92: | ||
==== Initial Adjustment of TIRF beam ==== | ==== Initial Adjustment of TIRF beam ==== | ||
| − | Once a sample is in focus, one should focus the TIRF beam on the back focal plane of the objective. This is accomplished by adjusting the horizontal micrometer on the right until a point is seen on the ceiling above the microscope. Astigmatism should be minimized by using the other two micrometers. This is called zeroing the TIRF beam, and the beam is considered to be at 0°. | + | Once a sample is in focus, one should focus the TIRF beam on the back focal plane of the objective. This is accomplished by adjusting the horizontal micrometer on the right until a point is seen on the ceiling above the microscope. Astigmatism should be minimized by using the other two micrometers. This is called zeroing the TIRF beam, and the beam is considered to be at 0°. The top micrometer should be zeroed. |
==== Using the TIRF beam for Epi-fluorescence ==== | ==== Using the TIRF beam for Epi-fluorescence ==== | ||
| Line 99: | Line 99: | ||
==== Using the TIRF beam for TIRF ==== | ==== Using the TIRF beam for TIRF ==== | ||
| + | |||
| + | The TIRF angle is set by the top micrometer. | ||
Revision as of 14:44, 28 March 2019
TESM
TESM stands for TIRF Epi-fluorescence Structured Light Microscope. Some specifications can be found here
TESM Startup
Power
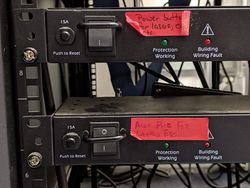
TESM is turned on by the two power switches at the bottom of the equipment rack to the left of the optical table. The order of which you turn them on doesn't matter.
Lasers
Only turn on the lasers required. The lasers should be power cycled once they have electrical power. The keys should moved to the horizontal position, and then moved to the vertical position. It can take as much as 5 minutes for them to go through their start-up cycle. During this time, they will ignore any commands from the computer. They will default to full power, about 100mW.
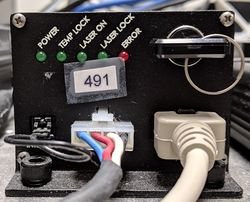
The 405nm, 491nm, and the 561nm laser control boxes are on the left front side of the optical table. Power levels are set from micromanager.
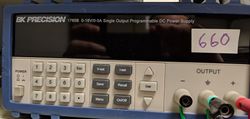
Unlike the other lasers, the 660nm laser is controlled by a power supply in the equipment rack.
The keys should be moved back to the horizontal position when you are finished using TESM for the day.
Micromanager
Micromanager User Guide has detailed information on how to use micromanager.
Log into TESM's computer, named Germanium, with your BIG credentials. Either start micromanager via an icon on your desktop, or open a terminal and type:
micromanager
If that fails, you can:
cd /usr/local/Imagej
./run
Startup Configuration
Micromanager will then go through a startup sequence. If this is the first time you have started micromanager on TESM, then you will need to select the correct configuration file. It is located here:
/storage/big1/kdb/MicroManager/MMConfigITC18.cfg
Custom Dialog
Micromanager will present you with a custom dialog with several options.
- 16X Slider: There is a rod on the left side of the microscope. When it is pulled out, you will get an increase of 1.6X in magnification, otherwise it is just 1X.
- TIRF or EPR: This sets the default light pathway. This can be changed later in the software.
- Camera Binning: With our default 60X 1.49 Objective, Binning = 2 is appropriate. If you are using a lower magnification objective, you might want to set binning to 1. This can be changed later in the software.
- Vertical Shift Speed: Leave this alone unless your name is Karl
Sutter LAMBDA 10-2
IMPORTANT
The Sutter LAMBDA 10-2 must be reset after you have closed the dialog by pushing the reset button on the left. This only needs to be done when you first start TESM for the day. If successful, you should see the Sutter LAMBDA 10-2 cycling through 0-1-2-3 filters as commanded by micromanager.
TIRF or Structured Light
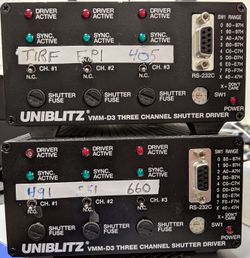
TESM has two imaging modes: TIRF and Structured Light. The Structured Light pathway is labelled EPI on the uniblitz. Only one of the two modes should be active at a given time.
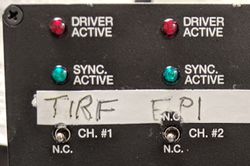
Normally, the imaging mode is selected by the computer, but you may override the computer by using two most left toggles on the top UNIBLITZ shutter driver.
Laser Shutters
TESM has 4 lasers: 405nm, 491nm, 561nm, and 660nm.
Each laser shutter can be manually opened by moving their respective toggle switch up. Remember, either the TIRF or the EPI (Structured Light) shutter must be open as well.
Normally, the which laser is being used is selected by the computer, but you may override the computer by the appropriate toggle on the UNIBLITZ shutter driver.
Laser Power
405, 491, 561
In Micromanager, open the Property Browser window by opening the menu:Open Tools->Device/Property Browser
This is where you can adjust the laser power for the 405, 491, and 561 lasers. The lasers need to have completed their start up first, which takes a few minutes. The units are in watts. For example, if you want 50 mW, then you should enter 0.05. Generally, the lasers power levels run between 0.001W and 0.1W. However, the 491 laser only goes down to 0.002W.
660
This laser's power level is set by the big Power Supply in the equipment rack. Select "V-set", then enter a number between 0.5 to 5, finally select "Enter." You might have turn the Voltage on be selecting the "On/Off" button.
Structured Light
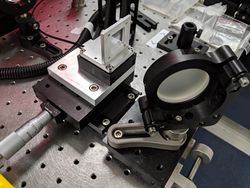
The Structured Light (SL) can be created by passing collimated light through a grating on the EPI path of TESM. We use a 500 lines/inch grating. TESM takes three SL images at 1/3 of a period of the grating. It only takes 2-3ms to move the grating between images. A custom TESM imaging protocol needs to be used in order to acquire SL images. The grating needs to be removed if you want to do pure Epi-fluorescence imaging on TESM.
TIRF
TIRF stands for Total Internal Reflection Fluorescence. The three micrometers in the picture adjusts the angle and focus of a converging beam.
The top micrometer moves the beam towards or away from the front of the microscope.
The front micrometer in front moves the beam side to side.
The right micrometer focuses the converging beam on the back focal plane of the objective.
Initial Adjustment of TIRF beam
Once a sample is in focus, one should focus the TIRF beam on the back focal plane of the objective. This is accomplished by adjusting the horizontal micrometer on the right until a point is seen on the ceiling above the microscope. Astigmatism should be minimized by using the other two micrometers. This is called zeroing the TIRF beam, and the beam is considered to be at 0°. The top micrometer should be zeroed.
Using the TIRF beam for Epi-fluorescence
The TIRF beam could be used for Epi-fluorescence when it is near or at 0°. I prefer it to be a few degrees away from 0° to minimize retro-reflections.
Using the TIRF beam for TIRF
The TIRF angle is set by the top micrometer.
